Windows play a key role in how your home looks and functions. Replacing old or outdated windows can make a dramatic difference.
New windows reduce maintenance, and can help with a variety of issues, including air quality, safety, and ease of use. They also increase a home’s value. Learn more about Replacement Windows Potomac.
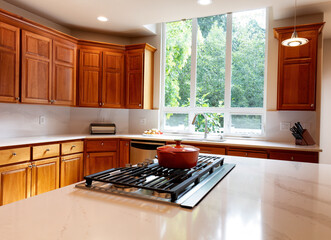
Many homeowners struggle with energy efficiency issues. Whether your old windows don’t allow enough air to flow through your house or they don’t provide proper insulation, they can cost you a lot of money in heating and cooling bills. New, more efficient replacement windows can dramatically cut your energy consumption. With the average household spending 40% of its budget on heating and cooling costs, this is a substantial savings that can have a major impact on your bottom line.
In addition to saving on your utility bills, new replacement windows can improve your home’s overall comfort and health. Having properly insulated windows and doors reduces the workload of your heating and cooling systems by keeping indoor temperatures more stable. This can also help prevent harmful UV rays from entering your home, which is an important consideration for anyone with young children or pets.
There are a variety of options when it comes to energy efficient replacement windows. When choosing the best ones for your home, make sure to consider things like frame material and type of glass. You’ll also want to look for a U-factor, solar heat gain coefficient, visible transmission and more. Additionally, check for an ENERGY STAR rating, which is an EPA-backed program that provides strict energy efficiency guidelines.
Having efficient windows can boost your home’s value. If you plan to sell your property in the future, upgrading to energy-efficient windows can provide a good return on investment. New, high-quality windows can also give your house a fresh appearance that will appeal to prospective buyers and show your commitment to efficiency.
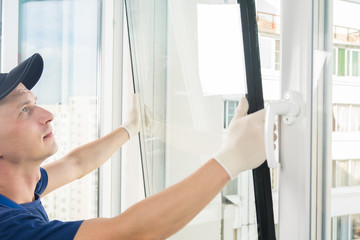
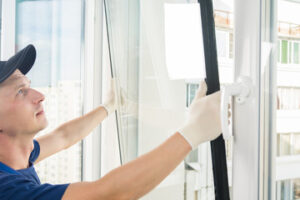
Energy efficient windows are available in a wide range of styles and materials, so you can find the perfect fit for your home. Before you begin installing your new windows, have your contractor take accurate measurements of the window openings and prepare the area for installation by removing any blinds or curtains. Also, be sure to clean the window frames and other surfaces thoroughly to ensure a seamless installation process. After you’ve selected your replacement windows, have them installed professionally by a reputable contractor.
Increased Home Value
Whether you’re planning on selling your home in the future or simply want to make it more comfortable, upgrading your windows is an excellent investment. The fact is, new replacement windows not only increase your home’s curb appeal, but they also improve the energy efficiency and marketability of your property.
Old and dated windows can be a real turn-off for potential buyers. If they’re outdated or damaged, they can make your entire house look neglected. Conversely, a well-maintained home that’s updated with modern windows will immediately catch their eye. In addition to improving your home’s aesthetics, modern replacement windows are highly durable and low-maintenance. You can choose from a variety of shapes and styles to complement your home’s architecture, from bay and bow windows to casement windows. Additionally, you can also opt for ENERGY STAR certified windows to reduce your energy costs even further.
Considering that inefficient windows account for up to 30% of your home’s energy usage, replacing them with new ones is an easy way to reduce your energy bills and your carbon footprint. In addition to saving money on your energy costs, you’ll also notice a significant reduction in outside noise.
There are two types of replacement window installation options – full frame and pocket – and which one is right for you depends on your needs. A full frame replacement involves removing the existing window, frames and moldings, giving you a totally new unit. This is ideal if your existing woodwork and framing are in poor condition, or you want a different style of window than you currently have.
In contrast, a pocket replacement installs your new window into the existing opening without removing any of your home’s original exterior walls. This method is perfect for renovation projects where you’re converting a door opening into a window, or if you want to add a new window where there wasn’t one originally. Pocket replacement windows are also a great choice for homeowners who want to install new ENERGY STAR windows but don’t want to pay the extra cost of a full frame replacement.
Increased Comfort
The windows in your home do more than let in light and give you a view of the outdoors. They play a key role in the insulative value of your home and affect its energy efficiency. In addition, they can impact your comfort. If you’re struggling to keep your home comfortable or dealing with drafty rooms and high air conditioning bills, replacement windows may be the answer.
New replacement windows are designed with contemporary advancements that make them more effective at regulating indoor temperatures. This helps to lower your reliance on artificial heating and cooling, which can reduce your energy bills significantly over time.
Most older homes have single-pane windows, which do a poor job of insulating the room. This can lead to a colder home and uncomfortable sleeping conditions, especially during the winter. Double- and triple-pane windows, on the other hand, are able to insulate your room effectively, resulting in a more comfortable sleep environment.
Modern replacement windows also come with advanced features that help to improve your home’s indoor air quality. These include low-e coatings that help to block out harmful UV rays and prevent condensation from building up in your window frames. In addition, they are able to limit the amount of outside noise that enters your home.
Effortless opening and closing: Double-hung, casement, and awning windows have precise hardware that makes it easy to open and close the sashes without causing sticking or jamming. User-friendly locks and latches ensure that the window is secure, which can be an important feature if you have kids or seniors living in the house.
Increased ventilation: Many styles have tilt-in or lift-out sashes that allow you to easily clean your window glass and frames. This is an important factor if you live in an area with lots of dust or pollen.
New replacement windows are available in a wide variety of configurations and add-ons that can enhance your home’s style and functionality. They can be installed in a number of ways, including pocket replacement and full frame installation. Pocket replacement involves removing the trim or casing from your existing window unit and replacing just the glass, while full frame installation is more extensive and replaces both the exterior and interior window components.
Increased Safety
Windows don’t often come to mind when you think of home safety, but they play a significant role in protecting your Delmarva Peninsula area home from break-ins and accidents. Many new replacement windows offer advanced security features to keep your family, pets and possessions safe.
These security benefits go beyond window latches and include the type of glass, durable frames, and other options that make it difficult for unauthorized individuals to gain access to your home. For example, laminated glass is much harder to break than traditional windows and resists penetration when broken. It also doesn’t shatter into dangerous shards that could harm children or pets. Additionally, the sturdy frames of new replacement windows are made from materials that can withstand forceful entry attempts.
Another important security feature is multi-point locking systems. These locking systems engage the windows at multiple points along the frame, making it more challenging for intruders to open or damage the window. Some advanced window options even integrate security sensors that can be switched on to detect vibrations and motion, alerting homeowners and deterring intruders.
Moreover, the new windows are designed to allow for easier escape in an emergency. Old windows are typically more difficult to open, which can make it more challenging to escape your home during a fire or other disasters. New windows are more likely to open easily, allowing you to quickly exit your home and ensure the safety of your loved ones.
Finally, new replacement windows offer glazing that protects your furniture and carpeting from UV rays. This is a big advantage over older windows, which let UV rays penetrate your interior, leading to premature fading of your carpeting and curtains. Newer replacement windows use a special type of glazing to block out these harmful rays, helping you protect your belongings and preserve the look and feel of your home.